TABLE OF CONTENTS
Configure Kiosk Mode for iPad
Sign-in to iCloud on the iPad, open the Apple Store and download Kiosk Mode for iPad.
After downloading and opening the app:
1. Go to the Homepage section
2. Enter the URL for your kiosk (ex: https://kioskname.mkiosk.info)

3. Click the "Save" button below to launch your digital kiosk

Note: The Kiosk Mode for iPad doesn't have any settings preventing access to the Home Page of the tablet by clicking the Home button. To prevent this and disallow access to the Home Page, enable Guided Access.
To Change the Kiosk MODE URL:
1. Click the iPAD Settings Icon
2. Scroll to the bottom of the page
3. Click the Kiosk Browser icon and change the Web Address as needed
Enable Guided Access
Follow the instructions below to protect the kiosk URL with a pin and prevent access to the tablet's Home Page.
After configuring Kiosk Mode for iPad:
1. Click the Home Button > Go to iPad Settings > General Tab

2. Click Accessibility > Guided Access

3. Turn Guided Access ON
4. Click Passcode Settings

5. Click Guided Access Passcode and set the passcode > Guided Access is now ready to Activate on Kiosk Mode for iPad

Note: on iPad Air or iPads running iOS12+, there's another option called Mirror Display Auto-Lock that you would have to toggle ON.

6. Click the Home button > Click the Kiosk Mode for iPad icon and make sure that the kiosk is displaying
7. Press the Home button three (3) times, and the Guided Access Options should display
8. Click the Hardware or Options buttons and choose which options to allow
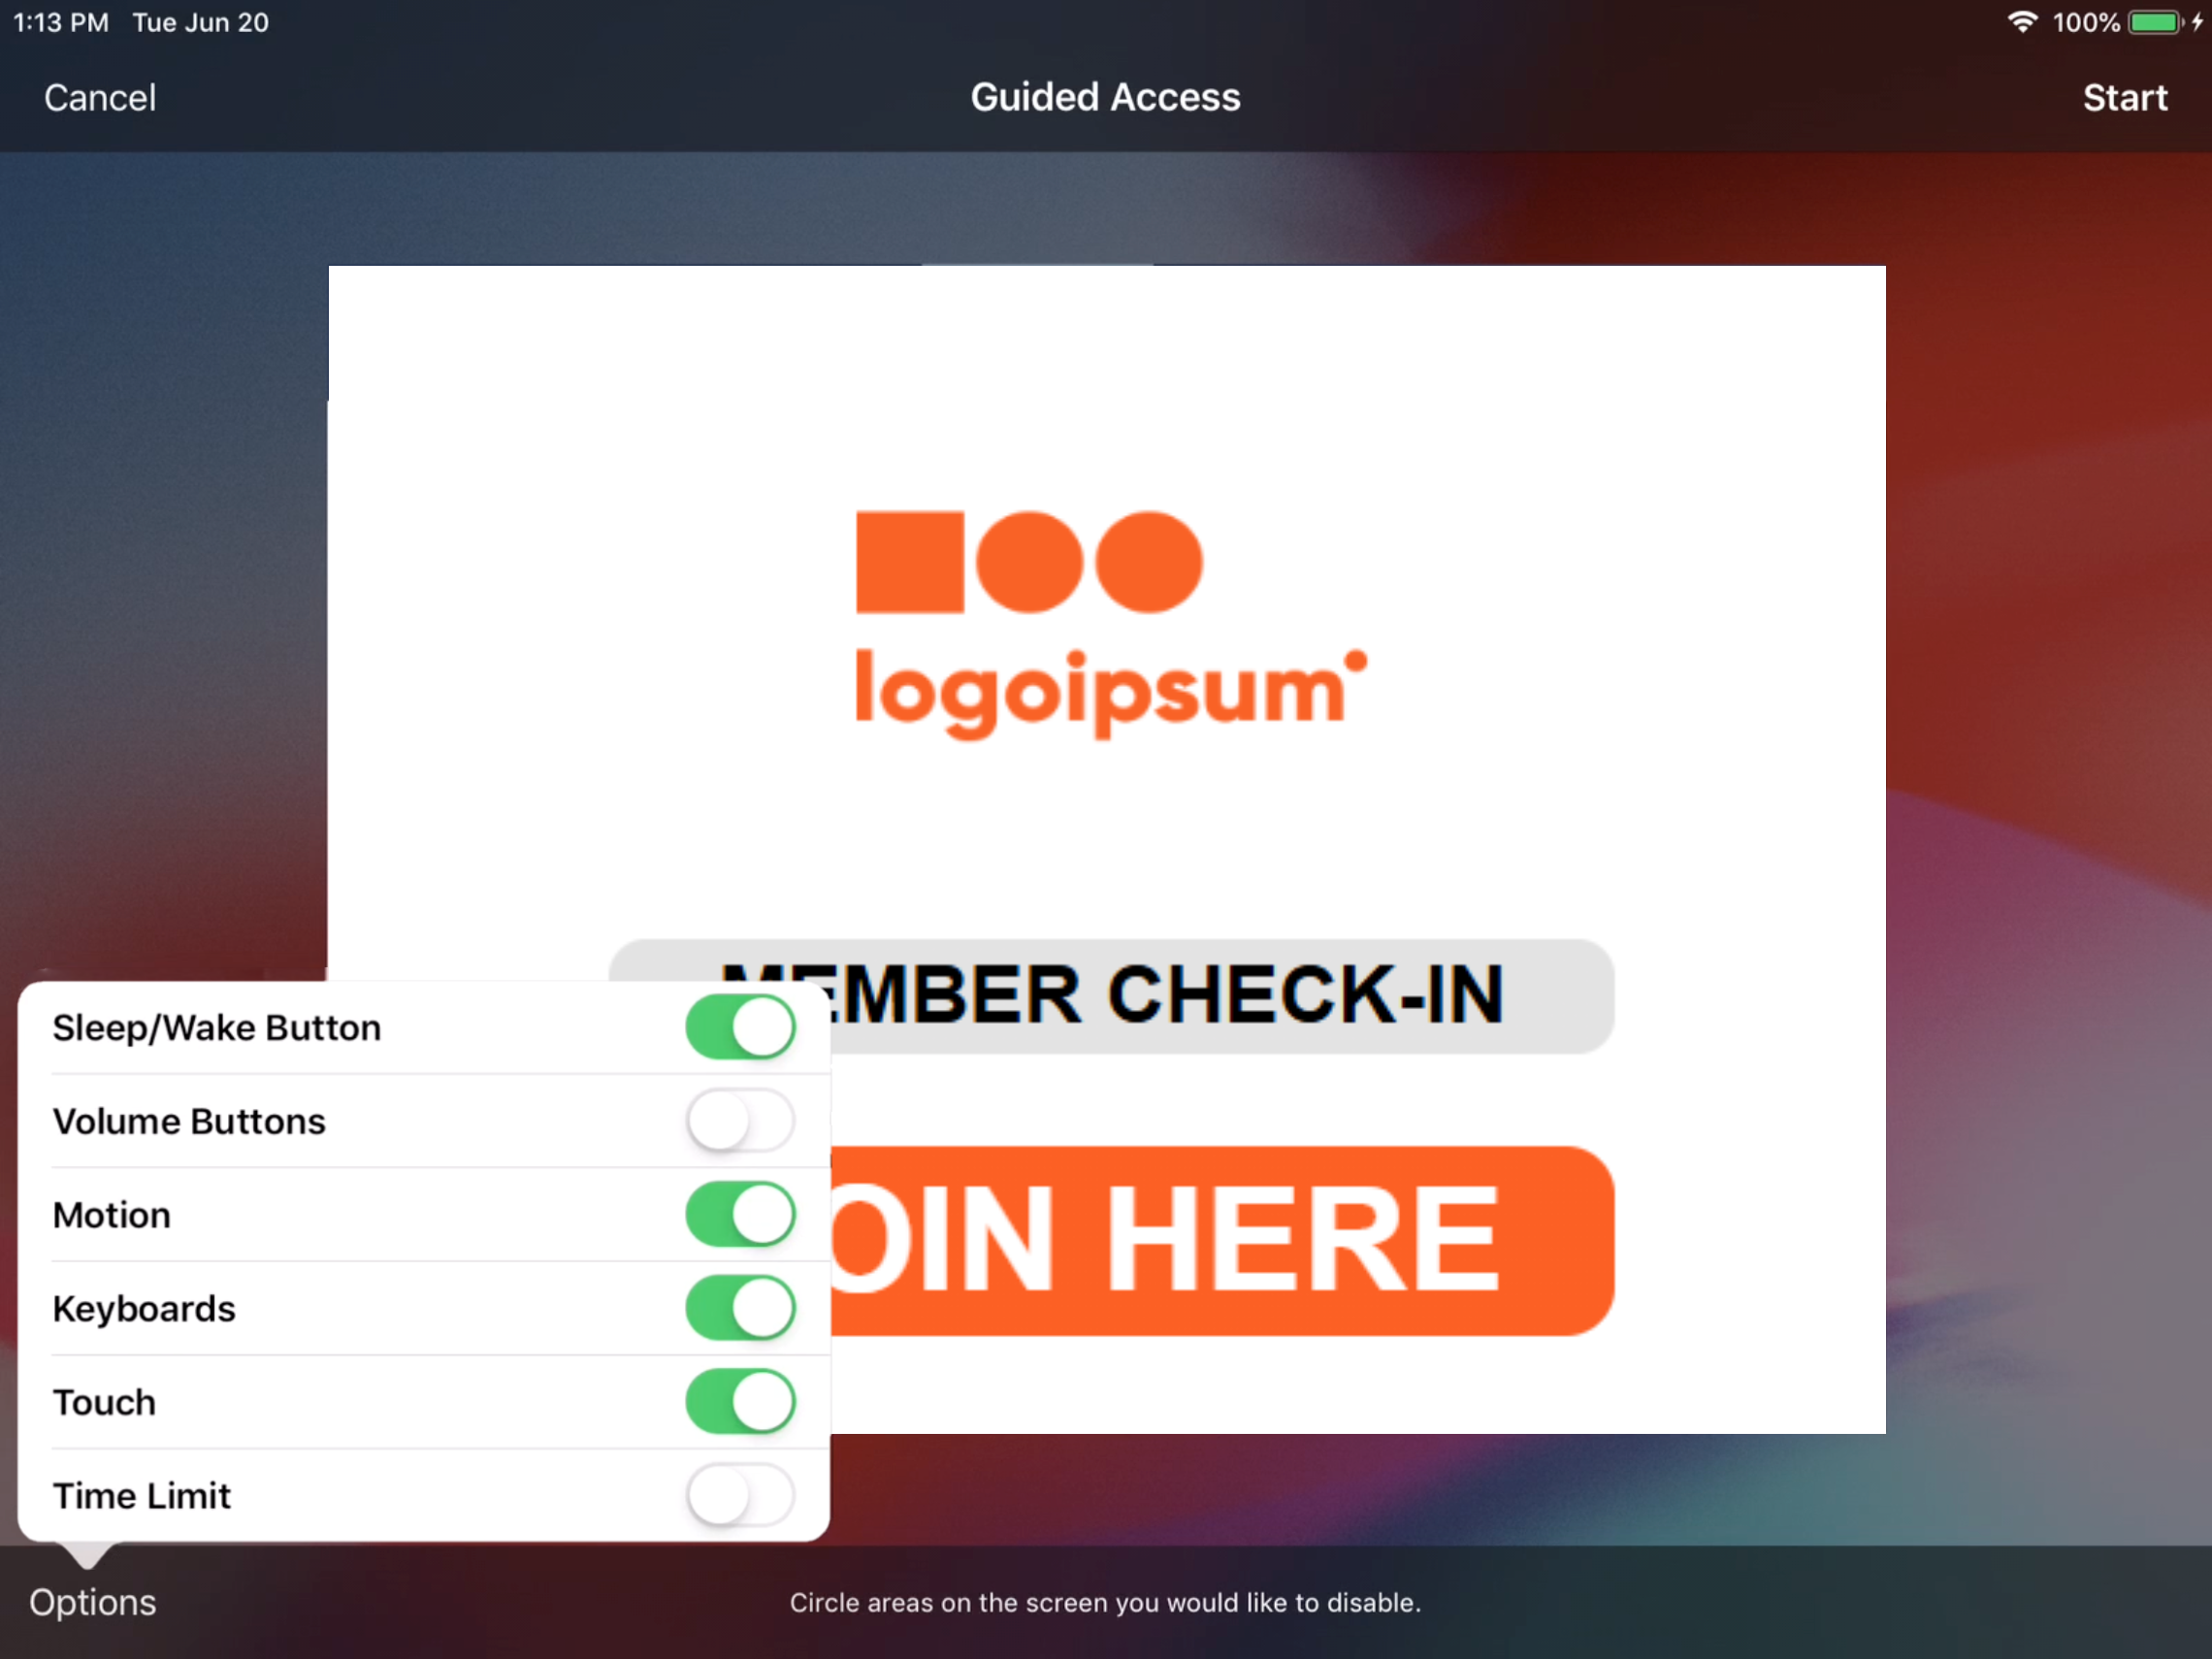
11. Click Start to lock Kiosk Mode for iPad in Guided Access mode.
Sign-Out of iCloud
This step is advised to prevent people with access to the iPad settings from downloading from the Apple Store and seeing other connected devices.
From the iPad setting menu, click the iCloud Tab and click the "Sign Out" button and confirm.